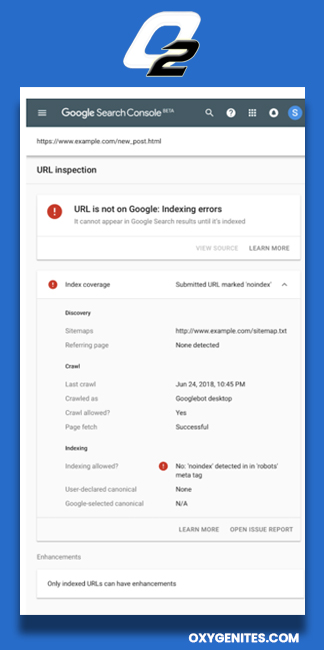
The URL inspection tool gives data about the indexed version of google about a selected page. This data will have many pieces of information like the AMP errors.
Google URL Inspection tool related to debugging that will make it easier for you to understand the appearance of your page while searching.
URL Inspection Tool can be access from the bar present at the top of your screen, from the navigation sidebar. Others where you see the search option.
This tool can only come into use when you are dealing with web pages and web searches.
Run the URL Inspection Tool:
If the user wants to access and know the index status at present, then certain steps need to follow.
These steps are mention below.
The first step is the user has to open the Google URL inspection tool. The URL that you are providing should be complete and under the current property.
If it is not then you have to set the properties on a current status. Otherwise, you will not be able to check the status.
It is not necessary that the URL you are entering should be AMP. Non-AMP URL status can also be checked through the process. Along with this, it will also inform you whether there is any duplicate version of that webpage. After this, you will have to read the results. Then check the index status of the URL by requesting to provide it.
Test Live URL:

Google is able to Index the URL or not. It will be the biggest doubt in your mind. As you are aware of the fact that you can check and test the URL live.
This life can be helpful when you need to test the page with the changes it has made contrary to the indexed version.
You have to follow some steps for the live URL test.
- Keep an eye on the indexed URL. This is easily accessible to you and this will not demand any information.
- On the result pages, you will see an option of Test Live URL. You will have to click on that option.
- There will appear the Test Live URL. Go through that thoroughly and try to understand it properly.
- If you want to reset it, you need to press the reload icon on your screen.
The Rendered page:
You can also take a look on the rendered page or more precisely at the screenshot. This can be convenient to confirm that everything present on the page is the same as you want them to appear. It will be easily accessible to the user when the test results are done. If the test results are not successful then you might face an issue in viewing it as it will not be available. The page itself will not allow to the presentation of a screenshot to the user.
- To view the rendered page the user has to go through the steps mentioned below.
- Reach the homepage of the website you are working on.
- On the result pages, go for the option of test results.
- Again click on the option of View Tested page. If as mentioned the test results were not successful, the process will end here.
- Then view the screenshot but tapping on the screenshot tab.
