<p
If you love photography, art, painting, or anything visually aesthetic, you’ve probably already used Pinterest by now. You might already have a Pinterest account or even be using it for business purposes. Pinterest is good for business but getting verified is another ballgame altogether! Getting verified can help ensure that you get the best out of your presence there. Having a verification badge for your brand will let your existing and potential customers know that you are authentic and secure.
What is Pinterest verification?
Pinterest verification is similar to getting verified on other social media platforms like Twitter, Facebook, or Instagram. Once verified, you’ll have a red checkmark beside your account and be able to display your full website URL on your Pinterest profile. This makes it easier for users to quickly learn more about your business and help you bring more leads to your site.
Why get verified on Pinterest?
The red verification badge is a status symbol on social media. Verification allows users to know you are reliable and authentic. It makes it much easier to spot the official pages from fake ones.
There are many perks of having a verified Pinterest account. These include but are not limited to:
- More visibility of your content. Search engines will recognize your Pins as relaying reputable information. This can generate more leads for your business and, ultimately, increased revenue.
- More engagement with your content. Users will know your brand or business is authentic when they see the red check mark. As, it’s more likely to save and share pins that come from a trustworthy source. Resharing will help increase your brand awareness.
- Drive more traffic to your website. Verified Pinterest users can display their website URL on their Pinterest profiles. This makes it easier for users to find out more about your business without further delay .
- Ensures you don’t lose followers to imposters. There are imposter accounts on every platform, and verification is one of the easiest ways to ensure your readers of your authenticity.
How to get verified on Pinterest
Getting verified on Pinterest doesn’t take too long and it’s well worth the effort. Here’s how to get verified on Pinterest in 3 easy steps.
1. Make sure you have a business account
If you don’t have a business account on Pinterest, you will need to do this before trying for verification. As a bonus, setting up a business account on Pinterest is free. It will also give you access to analytics and other important tools that can help you maintain and grow your professional presence on Pinterest.
Business accounts can also be linked to a personal Pinterest account and you’ll have the ability to switch between both. You can link a maximum of four business profiles to a personal Pinterest account. Platforms like accsmarket.com can also be helpful for acquiring aged or verified accounts to kickstart your social media strategy.
You can link a maximum of four business profiles to a personal Pinterest account.
To get started, first ensure you are signed in to your account. Then, click the three dots at the right corner of your screen.
Click Add a free business account.
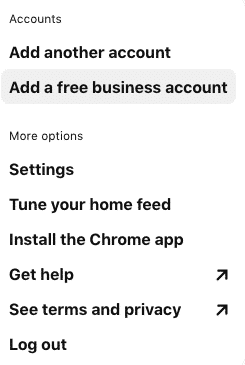
Source: Pinterest web page
Click on “Get started”. You will need to answer a few basic questions about your business including business name, website URL, country/region, and your preferred language. Then click Next.
Now you will be asked to describe your brand/business, which will help Pinterest customize your recommendations. You will get to choose from:
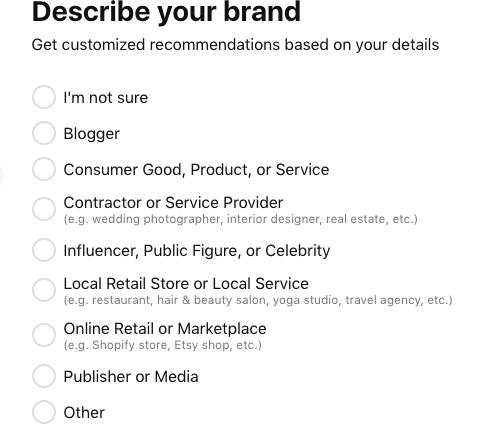
Source: Pinterest web page
Pinterest’s active user base grew 26% to 335 million last year, and it is the third-largest social network in many countries. So, there are many reasons you might want to advertise on Pinterest.
That’s it! You’re ready to start the process of getting verified!
2. Claim your website
After you’ve ensured that you have a business account, click the dropdown arrow on the top right of your screen and click Settings. Under Edit Profile, select Claim.
Type in your website URL into the first text box and click “Claim”
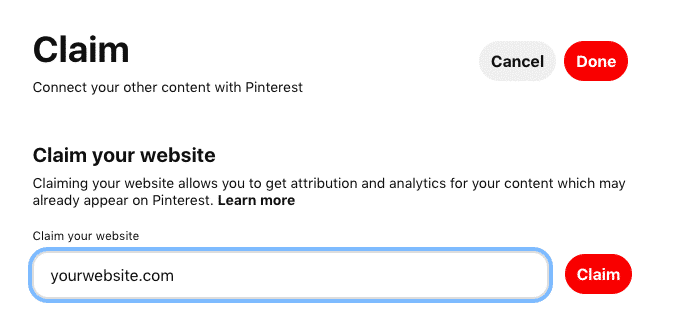
Source: Pinterest web page
Next, you will have two options available to you in a pop-up box:
1) Claim your website by pasting an HTML tag into the
2) Claim your website by downloading a file and uploading it to your website’s root directory
Here’s how to complete the first option :
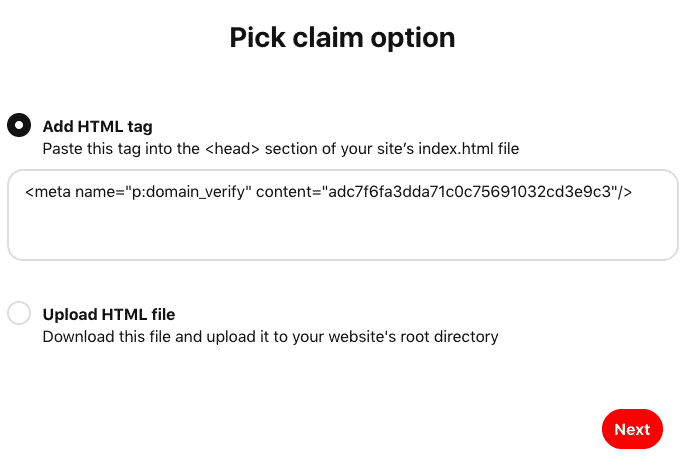
Source: Pinterest web page
It might seem like the process gets technical at this point, but it’s easier than you might think and most users have minimal issues. This is an easier option since you don’t need to use the complex File Transfer Protocol (FTP) .
Open a new tab and navigate to your website’s backend script area and copy and paste the HTML tag that Pinterest has provided. Finding the backend script area and pasting the HTML tag will vary depending on what provider you used to build your website.
If you are using WordPress, for example, you would open the content management system, click Tools, then Marketing, and then Traffic. Under the Site Verifications Services section, you will find a Pinterest field where you can simply paste the code.
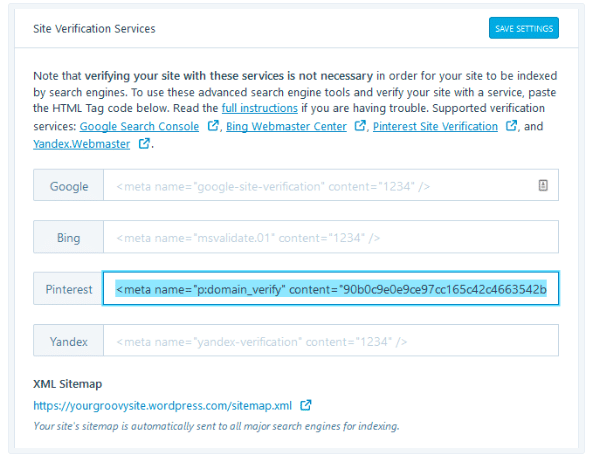
Source: WordPress web page
If you’re having trouble figuring out where to paste your HTML file, Pinterest has created a page with instructions its users. You can also contact Pinterest directly if you need more help.
Here’s how to complete the second option:
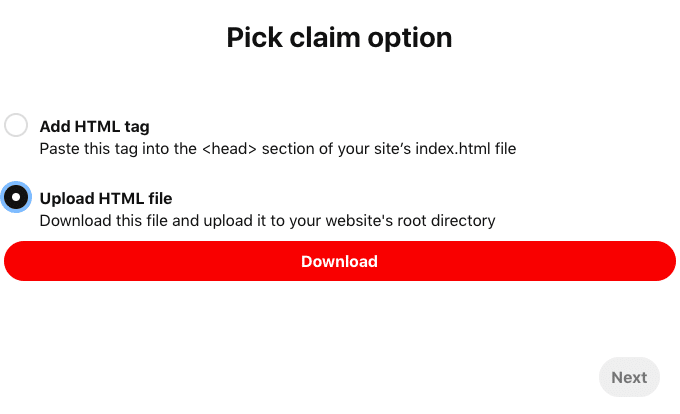
Source: Pinterest web page
This option is typically a little harder than the first, but can still be done without too much effort. First, download your unique HTML file. You can leave it in your downloads folder or move it to your desktop for easy access. Your file will be saved as a variation of Pinterest-xxxxx.html, with each x being a random number or letter. Note: You cannot rename this file or the process will not work.
Once you’ve saved the file, the next step is to upload the HTML file. You upload it to your website on your hosting account via File Transfer Protocol (FTP). Make sure you transfer the file to your main domain (not a sub-folder) else Pinterest will not be able to locate it.
3. Submit your request for review
Now you’re ready to send your request in to be reviewed by Pinterest. Go back to your Pinterest tab and click Next.
Then, click Submit.
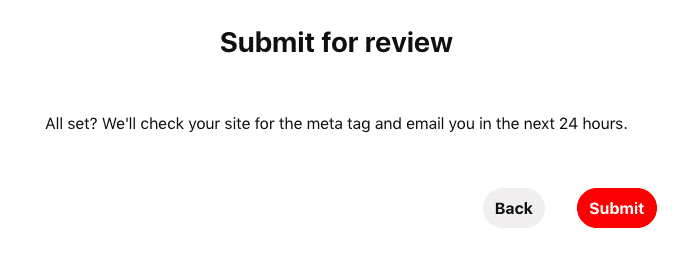
Source: Pinterest web page
You’re all set! You should hear from Pinterest within 24 hours. We as a company also provide Pinterest verification services and, if you need our help we are just around the corner.